
BUTTON - INSTRUCTIONS FOR USE
BUTTON INSTRUCTIONS FOR USE: The Button is a wireless emergency alarm button with accidental activation protection. It can operate for up to 5 years on the included battery. It connects to the Ajax security system via the Jeweller security protocol, with a transmission range of up to 1300 m without interference. The Button only connects to Ajax centers. No terms are applicable...

INSTRUCTIONS FOR USING THE BUTTON
The Button is a wireless emergency alarm button with accidental activation protection. It can operate for up to 5 years on the included battery. It connects to the Ajax security system via the Jeweller security protocol, with a transmission range of up to 1300 m without interference.
The button only connects to Ajax hubs . No arrangements have been made to connect with ocBridge Plus and uartBridge integration modules!
The button is linked to the security system and configured via Ajax applications for Windows, macOS, iPhone, and Android smartphones. Users are alerted to all alarms and events via push notifications, SMS, and phone calls (if enabled).
Ajax security systems can be used for independent website monitoring and can be connected to a security company's central monitoring station.
Functional factors

-
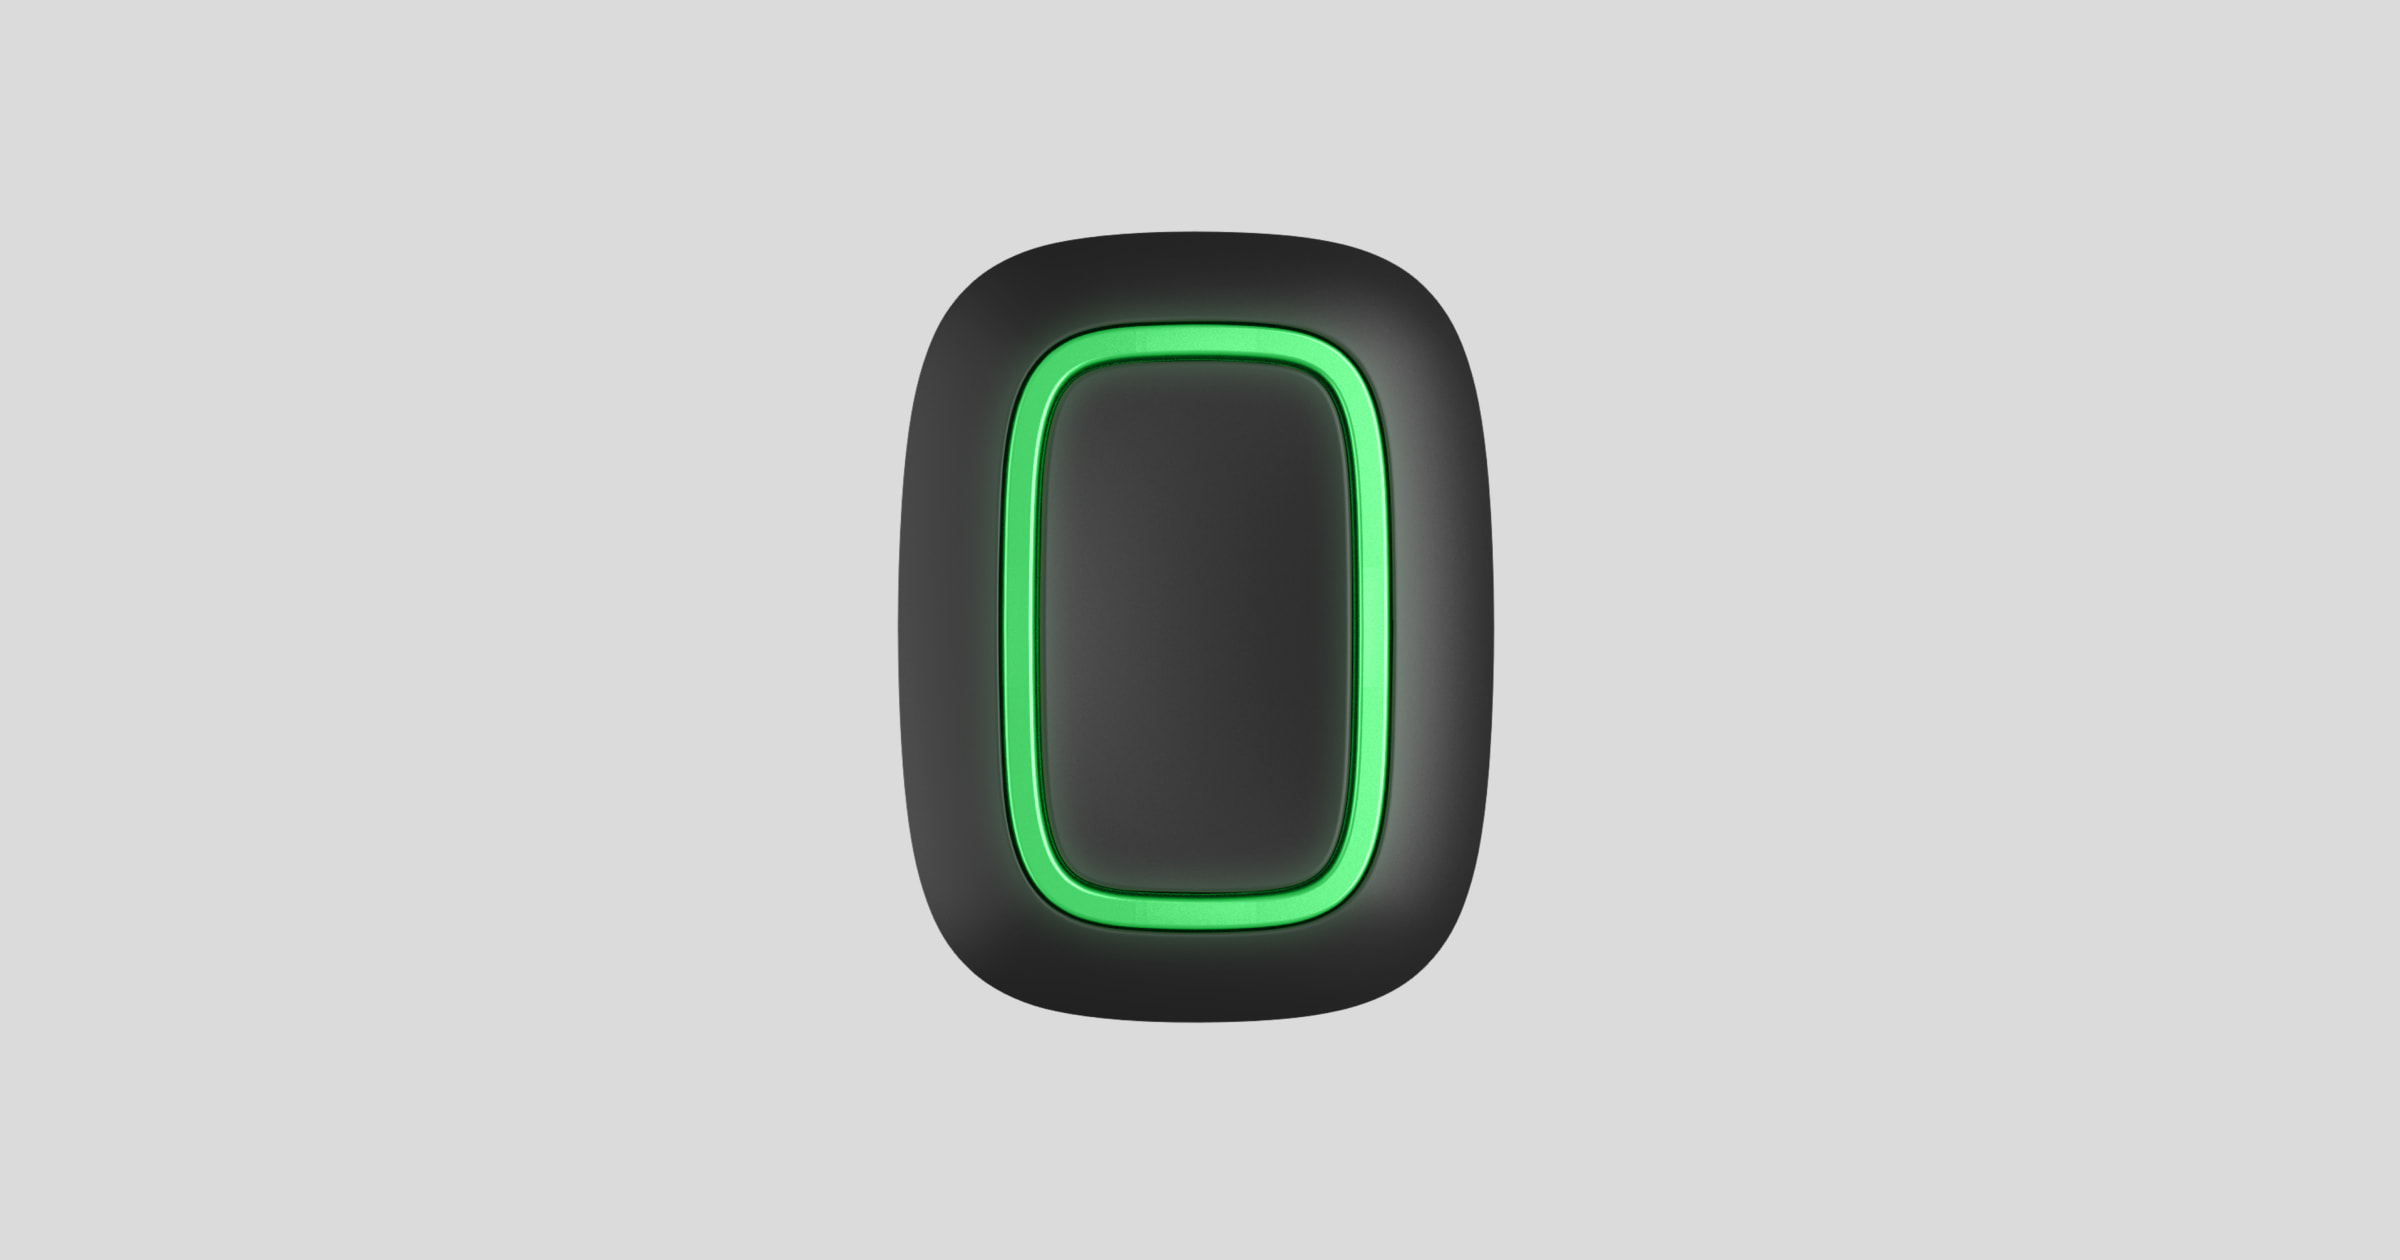
Warning button
-
Indicator light
-
Hook hole
Operating principle
The Button is a wireless emergency alert button that, when pressed, transmits an alert to the user, as well as to the security company's CMS.
The button is equipped with protection against accidental activation and transmits alarms up to 1,300 m from the central unit. Please note that the presence of any obstructions that interfere with the signal (e.g., walls or floors) will reduce this range.
The Button is easy to carry. You can always keep it on your wrist or wear it around your neck. The device is dustproof and splash-proof.
Connect Button to the Ajax security system.
Before starting the connection
-
Follow the center's instructions to install the Ajax application . Create an account, add a center to the application, and create at least one room.
-
Import the Ajax application.
-
Activate the hub and check your internet connection.
-
Ensure that the center is not armed and is not being updated by checking its status in the app.
Only users with administrator privileges can add devices to the hub.
To connect a Button
-
Click on Add device in the Ajax app.
-
Name the device, scan the device's QR code (located on the package) or enter it manually, select the room and group (if group mode is enabled).
-
Click Add and the countdown will begin.
-
Hold the button for 7 seconds. When the button is added, the LED will flash green once.
For detection and pairing, the Button must be placed in the central radio communication area (on the single protected object).
The connected button will appear in the list of central devices in the application. Updates to the device's status in the list are independent of the voting time value in the central settings. Data is updated simply by pressing the button.
Button only works with one hub. When connected to a new hub, Button stops transmitting commands to the old hub. Note that after being added to the new hub, Button is not automatically removed from the old hub's device list. This must be done manually via the Ajax application.
Device status
The Button status can be viewed in the device menu:
-
Ajax application button
|
Parameter |
Value |
|
Charging the battery |
Battery capacity button. It has two states:
|
|
Button operating mode |
This will show the operating mode of the Button. There are two modes:
|
|
Indicator light brightness |
Displays the current brightness level of the indicator light:
|
|
Protection against accidental activation |
Display the selected protection type against accidental triggers:
|
|
Basic program |
Carburetor version |
|
ID |
Device ID |
Setting
You can adjust the device's parameters in the settings:
-
Install the Ajax application device button.
|
Parameter |
Value |
|
first school |
The device name can be changed. |
|
Room |
Select the virtual room that the device is assigned to. |
|
Button operating mode |
This will show the operating mode of the Button. There are two modes:
|
|
Device users |
Assign a user to the Emergency Alarm Button. After assignment, pressing the Button will be displayed as an event for the selected user. |
|
Indicator light brightness |
This will display the current brightness of the indicator light:
|
|
Protection against accidental activation |
Display the selected protection type against accidental triggers:
|
|
Firmware |
Firmware version |
|
ID |
Device ID |
Please note that any changes to the settings will be applied on the second click!
Operating instructions
The button's status is indicated by a red or green LED.
|
category |
Assign |
Event |
|
Link to the security system |
The green LED flashes 6 times. |
Button is not registered in any security system. |
|
The green light stays on for a few seconds. |
Add a button to the security system. |
|
|
Order delivery instructions |
Light up quickly |
The command was transmitted to the security system. |
|
Brighten up a little |
The command was not transmitted to the security system. |
|
|
Feedback instructions (in accordance with the Order Distribution Directive)
|
The green light illuminates for about half a second after the order distribution signal. |
The security system has received and executed the command. |
|
The red light came on after the order distribution signal. |
The security system did not execute the command. |
|
|
Battery status (Follow the Feedback Instructions) |
After the main indicator, it lights up red and then turns off. |
The button's battery needs to be replaced. At the same time, the button commands are being sent to the security system.
|
Use cases
The button can be installed on a flat surface or carried around.
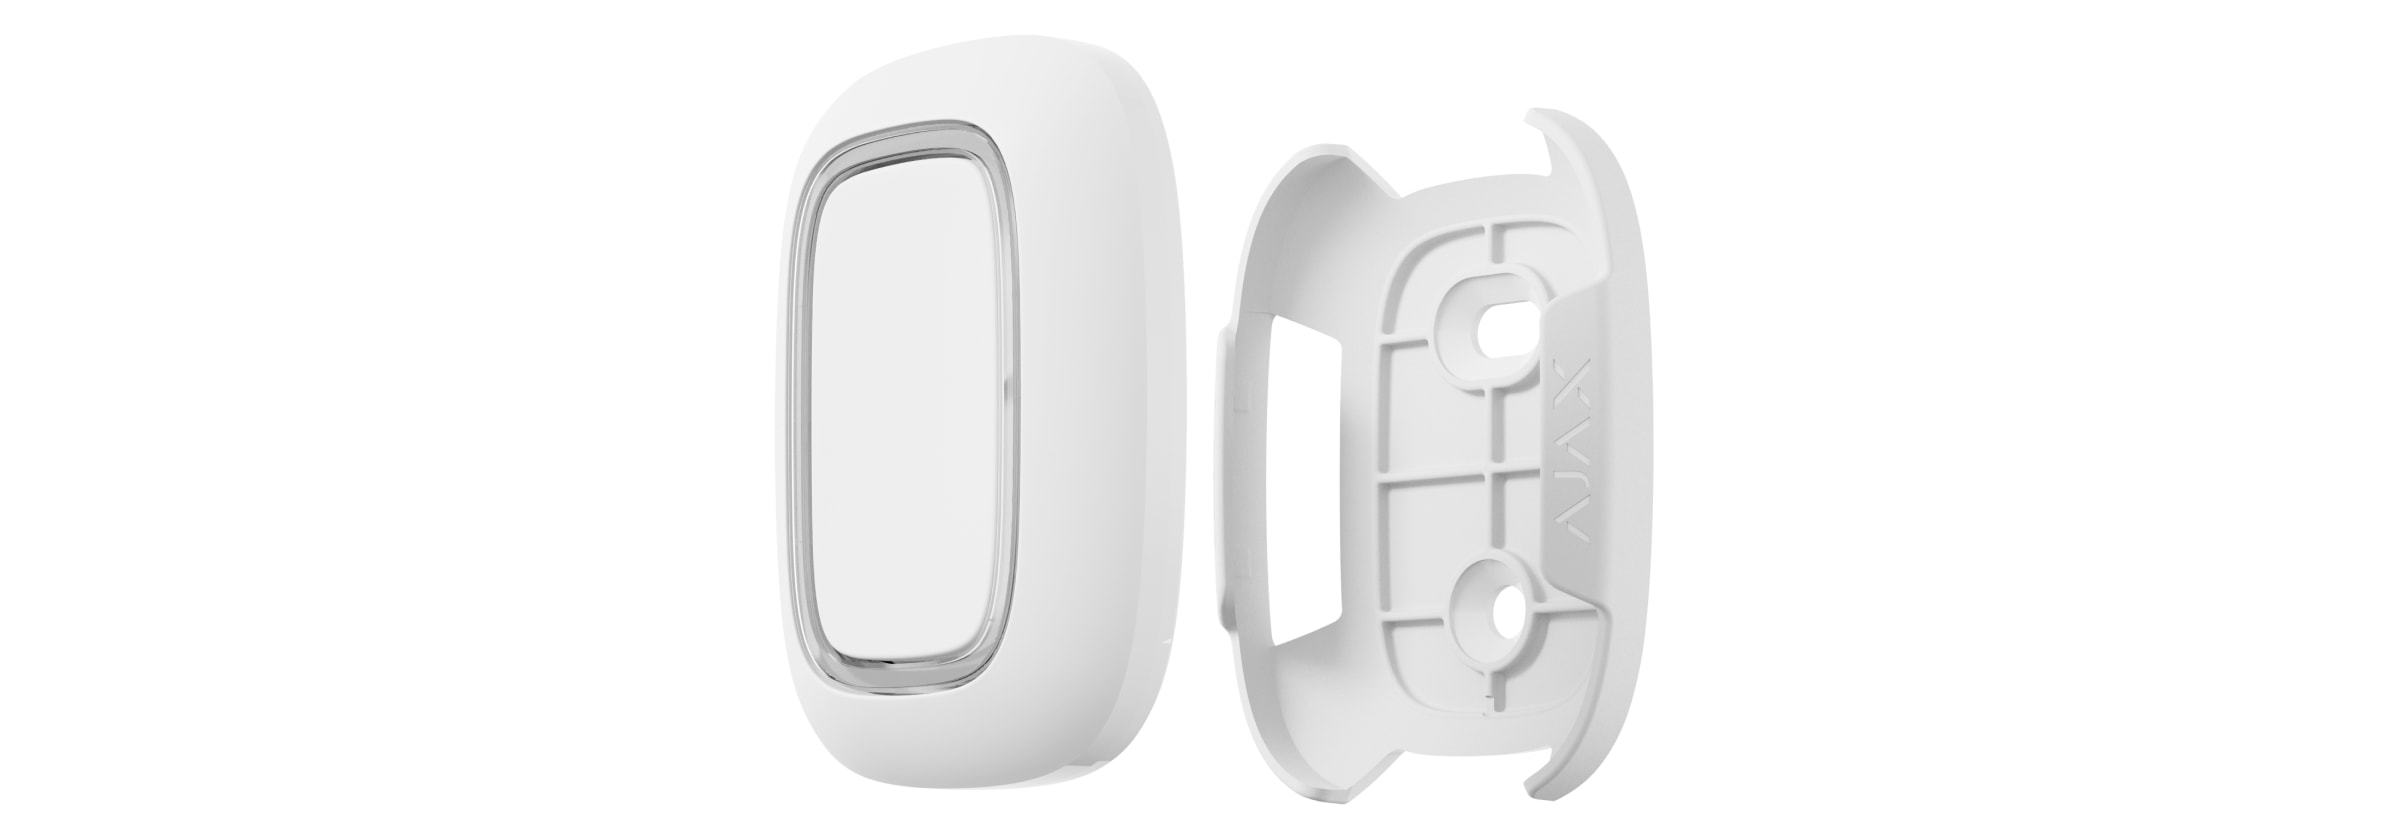
To install it on a flat surface (for example, under a table), secure the button with double-sided tape.
To attach the Button to a lanyard: attach the lanyard to the Button using the mounting hole in the Button's main body.

Maintenance
When cleaning the key fob body, use a suitable cleaning agent for technical maintenance.
Never use substances containing alcohol, acetone, gasoline, or other active solvents to clean the Button.
The pre-installed battery provides up to 5 years of fob operation under normal use (one press per day). More frequent use may reduce battery life. You can check the battery level at any time in the Ajax app.
The pre-installed battery is very sensitive to low temperatures, and if the key fob cools down significantly, the battery level indicator in the app may display inaccurate values until the key fob warms up.
The battery level value is not updated regularly; it only updates after the button is pressed.
When the battery is low, the user will receive a notification in the Ajax app, and the LED will light up red continuously and turn off each time the button is pressed.
Technical specifications
|
Button Number |
1 |
|
LED backlight indicates the transaction order. |
Available |
|
Protection against accidental activation |
Available |
|
frequency band |
868.0 - 868.6 MHz or 868.7 - 869.2 MHz, depending on the sales region. |
|
Compatibility |
Works with Hub , Hub Plus , Hub 2 , and ReX running Malevich OS 2.7.102 or later. |
|
Maximum radio signal power |
Up to 20 mW |
|
Radio signal modulation |
GFSK |
|
Radio signal range |
Up to 1,300 m (without obstacles) |
|
Power supply |
1 CR2032 battery, 3V |
|
Battery life |
Up to 5 years (depending on frequency of use) |
|
Protective layer |
IP54 |
|
Operating temperature |
From -10°C to +40°C |
|
Operating humidity |
Up to 75% |
|
Size |
47 x 35 x 13 mm |
|
Weight |
16 g |
Complete set
-
Button
-
CR2032 battery is pre-installed.
-
Double-sided tape
-
Quick guide
Guarantee
The warranty for products manufactured by AJAX MANUFACTURING SYSTEMS Co., Ltd. is valid for 2 years after purchase and does not extend to the included battery.
If the device is not working properly, we recommend contacting support first, as technical issues can be resolved remotely in half of the cases.