
CombineProtect - INSTRUCTIONS FOR USE
INSTRUCTIONS FOR USE CombiProtect CombiProtect is a device that combines a wireless motion sensor with an 88.5° viewing angle and a 12-meter range, as well as a glass break detection sensor with a 9-meter range. It can ignore animals and detect a person in the protected area from the very first step.

Instructions for using CombiProtect
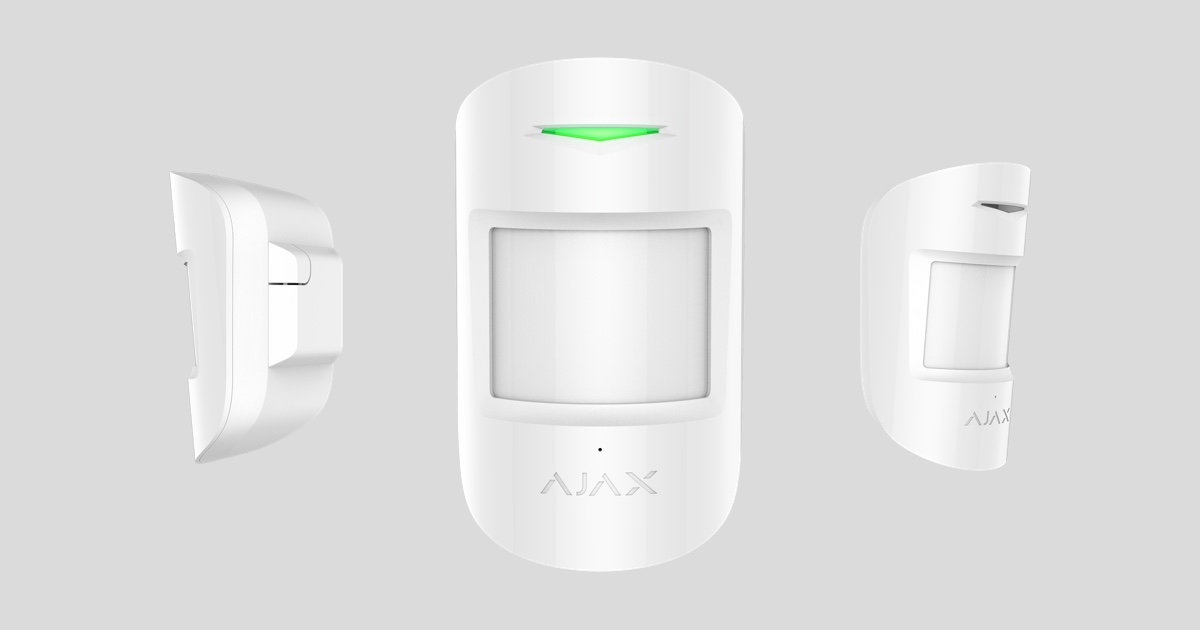
CombiProtect is a device that combines a wireless motion sensor with an 88.5° viewing angle and a 12-meter range, as well as a glass break detection sensor with a 9-meter range. It can ignore animals and detect a person in the protected area from the very first step. It operates for up to 5 years thanks to its built-in battery and is designed for indoor use.
CombiProtect operates as part of an Ajax security system, connecting to the Hub via the Jeweler security protocol. Communication range is up to 1200 meters in unobstructed conditions. The sensor can also be used as part of a third-party security controller thanks to integrated Ajax uartBridge or Ajax ocBridge Plus modules.
The sensor is configured via a mobile app for smartphones on iOS and Android. Push notifications, SMS messages, and calls (if enabled) will be sent to inform users of all their events.
Ajax security systems are self-contained, but users can connect them to a security company's control panel.
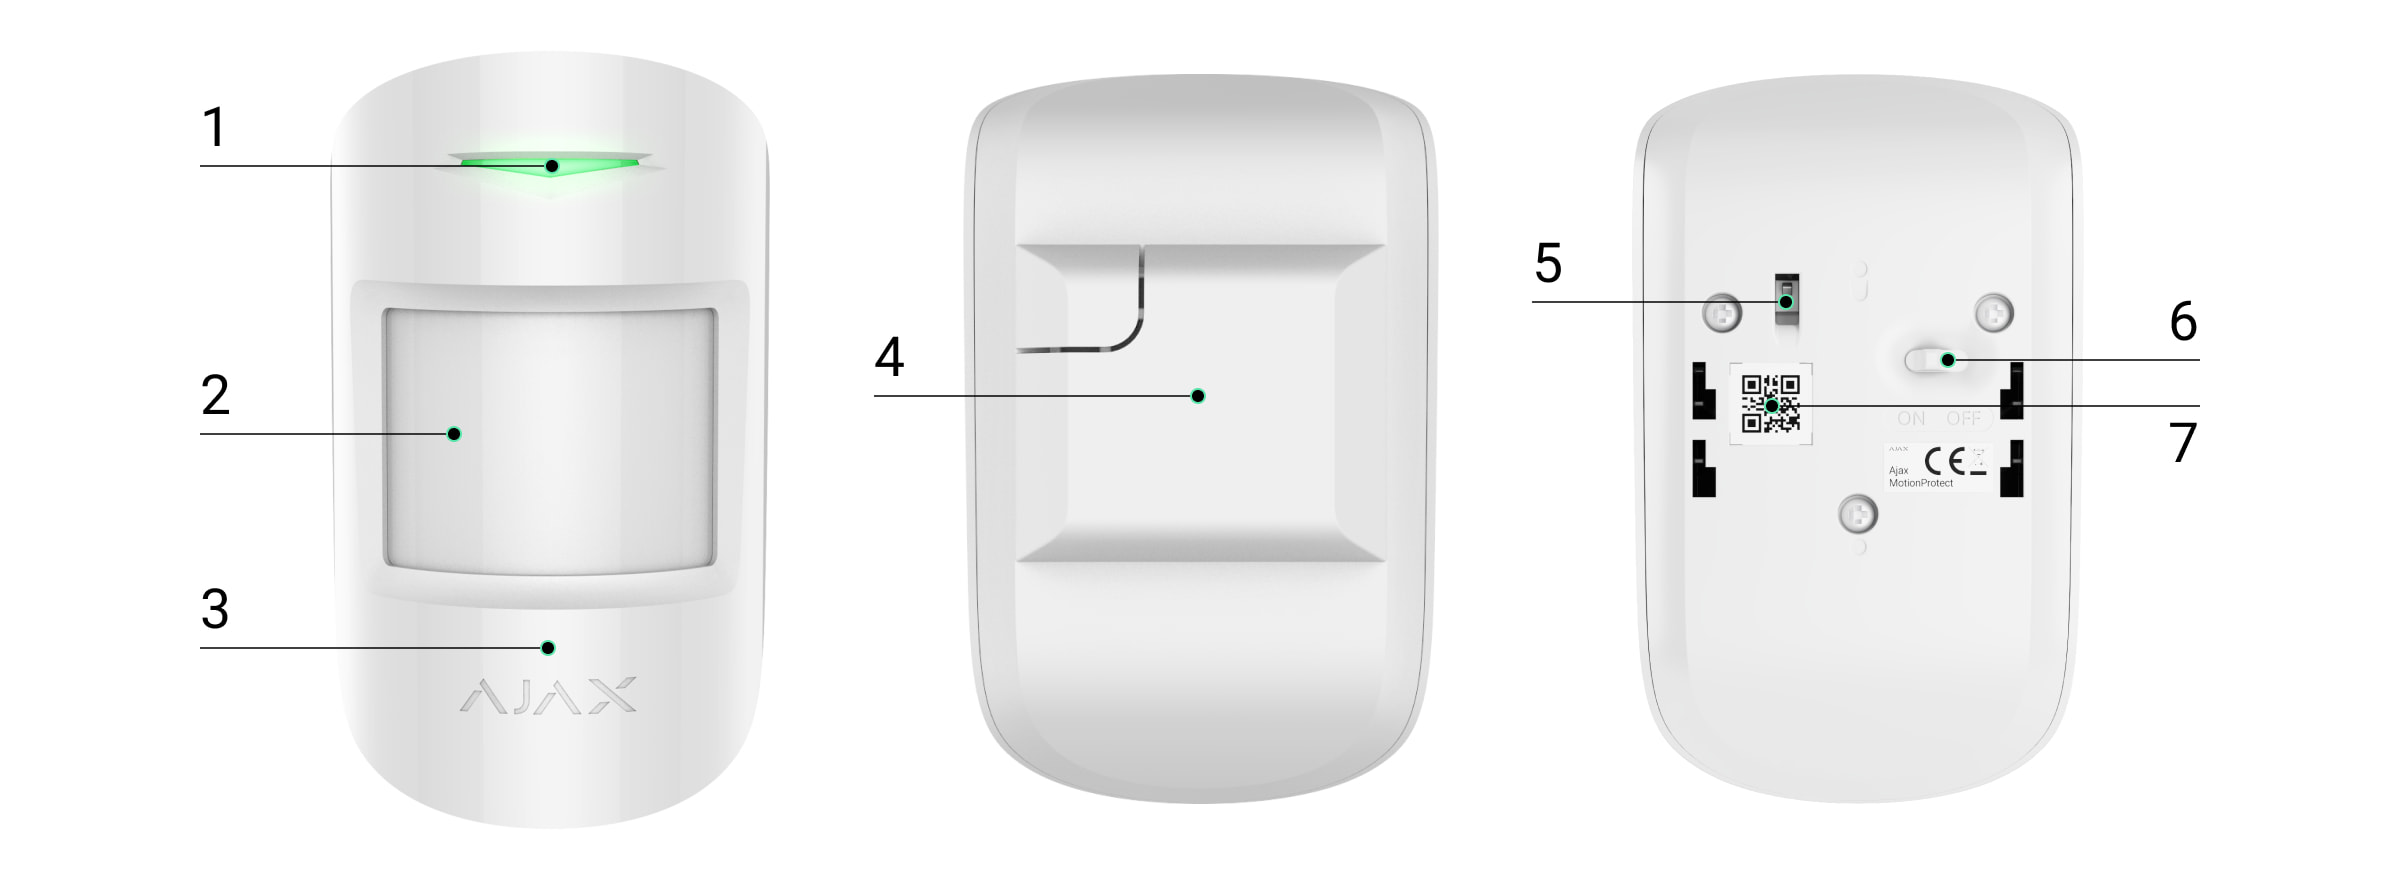
Function of the parts
-
Indicator light
-
Motion sensor lens
-
Microphone jack
-
SmartBracket mounting bracket (the perforated section is necessary to activate the anti-vandalism feature when attempting to tear the sensor from the surface)
-
Vandal-proof switch
-
Device switch
-
QR code
Operating principle
Ajax CombiProtect combines two types of security devices - motion sensors ( MotionProtect ) and glass break sensors ( GlassProtect ).
A thermal PIR sensor detects intrusion into a protected area by detecting moving objects with temperatures close to human body temperature. Furthermore, the sensor can ignore pets – simply set the appropriate sensitivity in the settings.
Electronic microphones are responsible for detecting broken glass. An intelligent system for recording an event requires a sequence of sounds with certain characteristics – first the impact, then the ringing of falling fragments, ensuring protection against accidental incidents.
|
The CombiProtect sensor will not react to breakage if there is a film applied to the glass: shockproof, sunproof, decorative, or other. To overcome such glass breakage issues, we recommend using the DoorProtect Plus wireless sensor to detect opening, vibration, and tilt. |
Once activated, the sensor immediately transmits an alarm signal to the Hub, triggering the siren connected to the hub, notifying the user and the security company.
The Ajax security system (including the Ajax CombiProtect sensor) is configured via the Ajax Security System app, using the SpaceControl remote control or the KeyPad keyboard.
If the sensor detects movement before the system is activated, it will not trigger the alarm immediately, but rather during the next inquiry by the control center.
Connect the sensor to the Ajax security system.
Connect the device to the Hub.
Before you begin connecting:
-
Following Hub's instructions, install the Ajax app on your smartphone. Create an account, add it to the Hub app, and create at least one room.
-
Switch to the Ajax application.
-
Turn on the Hub and check your internet connection (via Ethernet cable and/or GSM network).
-
Ensure that the Hub is not equipped with or updated by checking its status in the mobile app.
Only users with administrator privileges can add devices to the hub.
How to connect the sensor to the Hub:
-
Click on Add device in the Ajax app.
-
Name the device, scan or manually enter the QR code (located on the packaging), select the room location. Click Add - the countdown will begin.

-
Turn on the device.
To detect and issue an alert, the device must be placed within the radio coverage area of the control center (on the same protected object).
Connection requests to the hub are only transmitted when the device is powered on.
If the connection to the Hub fails, turn off the sensor for 5 seconds and try again.
When a CombiProtect device is connected to the hub, it will appear in the list of hub devices in the application. The status of the devices in the list updates depending on the polling time set in the hub's settings; the default value is 36 seconds.
Connect the sensor to a third-party security system.
To connect the sensor to a third-party security control device using the uartBridge or ocBridge Plus integration module, follow the recommendations of the respective device.
Device status
Device → CombiProtect
|
Parameter |
Meaning |
|
Temperature |
The temperature sensor measures the temperature on the processor and it changes gradually. |
|
Signal strength |
Signal level between hub and sensor |
|
Battery level |
The sensor's battery level is displayed in 25% increments. |
|
Anti-sabotage mode |
The status of the anti-vandalism sensor, responding to incidents or breaches of the chassis integrity. |
|
Login delay, seconds |
Entry delay |
|
Output delay, seconds |
Delay when exiting |
|
Connect |
Connection status between hub and sensor |
|
Motion sensor sensitivity |
Motion sensor sensitivity level |
|
The motion sensor is always active. |
When switched on, the motion sensor is always on. |
|
Sensitivity of the glass break sensor |
Sensitivity level of glass breakage sensor |
|
The glass break sensor is always active. |
When switched on, the glass break sensor is always on. |
|
Software |
Sensor software version |
|
Device ID |
Device unique ID |
Sensor settings
Device → CombiProtect →⚙️
|
Customization |
Meaning |
|
first school |
The sensor name can be edited. |
|
Room |
Select a virtual room where the device is assigned. |
|
Motion sensor |
When switched on, the motion sensor is activated. |
|
Motion sensor sensitivity |
Choose the sensitivity level for the motion sensor:
|
|
The motion sensor is always active. |
When switched on, the sensor constantly detects movement. |
|
Activate the glass break sensor. |
When switched on, the glass break sensor is activated. |
|
Sensitivity of the glass break sensor |
Select the sensitivity level of the glass break sensor:
|
|
The glass break sensor is always active. |
When switched on, the sensor always registers broken glass. |
|
Login delay, seconds |
Choose to delay the time at the entrance. |
|
Output delay, seconds |
Choose the exit delay time. |
|
Latency in night mode |
Enable delay when using night mode. |
|
Nighttime security |
When enabled, the sensor will switch to protective mode when using night mode. |
|
Activate the alarm if motion is detected. |
When activated, the HomeSiren and StreetSiren sirens will sound when motion is detected. |
|
Activate the alarm if the window is broken. |
When activated, the HomeSiren and StreetSiren alarms sound upon detecting broken glass. |
|
Put the sensor into signal level test mode. |
|
|
Place the sensor within the detection area for testing. |
|
|
Switch the sensor to signal extinction test mode (available in sensors with software version 3.50 or higher). |
|
|
User manual |
Open the sensor's user manual. |
|
Remove the device. |
Disable the sensor from the Hub and delete its settings. |
Display
|
Event |
Display |
Note |
|
Sensor turned on |
The light stays green for about one second. |
|
|
Connect sensors to Hub, ocBridge, and uartBridge. |
Continuously for a few seconds. |
|
|
Alarm / Anti-sabotage activation |
The blue light lasted for about a second. |
The alarm is transmitted every 5 seconds. |
|
The battery needs replacing. |
When an alarm is triggered, it lights up gently and turns green. |
Replacing the sensor battery is described in the Battery Replacement section. |
Check functionality
Ajax security systems allow you to conduct tests to verify the performance of connected devices.
Tests do not start immediately, but no later than 36 seconds with standard settings. The test start time depends on the sensor's polling time setting (Jeweller's setting in Hub settings).
-
-
Check the detection area of the glass break sensor.
-
Check the motion detection area.
-
Device settings
Choose an installation location.
The effectiveness of a security system depends on the placement of the sensors and the area they cover.
The position of the CombiProtect sensor is determined by its distance from the central processor and the presence of barriers between the devices that prevent radio signals from passing through: walls, interfering ceilings, and objects at the spatial level within the room.
Check the signal level at the installation location.
With a single-bar signal, we cannot guarantee the stable operation of the security system. Take possible measures to improve signal quality! At a minimum, moving the device – at least 20 cm – can significantly improve reception quality.
If, after moving, the device still has a low or unstable signal, use a ReX radio repeater.
Ideally, the sensor's lens should be perpendicular to the intended line of entry into the room, and the sensor microphone should be positioned relative to the window at an angle of no more than 90 degrees.
Ensure that furniture, houseplants, vases, decorative objects, or glass are not within the sensor's field of view.
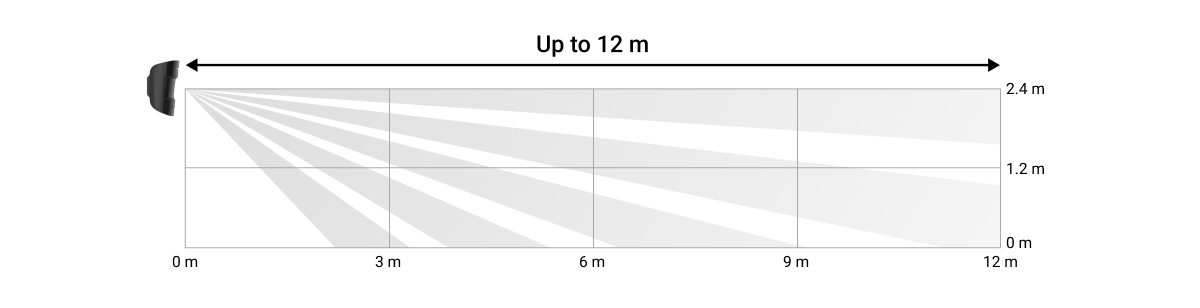
We recommend installing the sensor at a height of 2.4 meters.
Installing sensors at heights other than the recommended height will reduce the motion detection area, and broken glass may cause the sensor to miss animals.
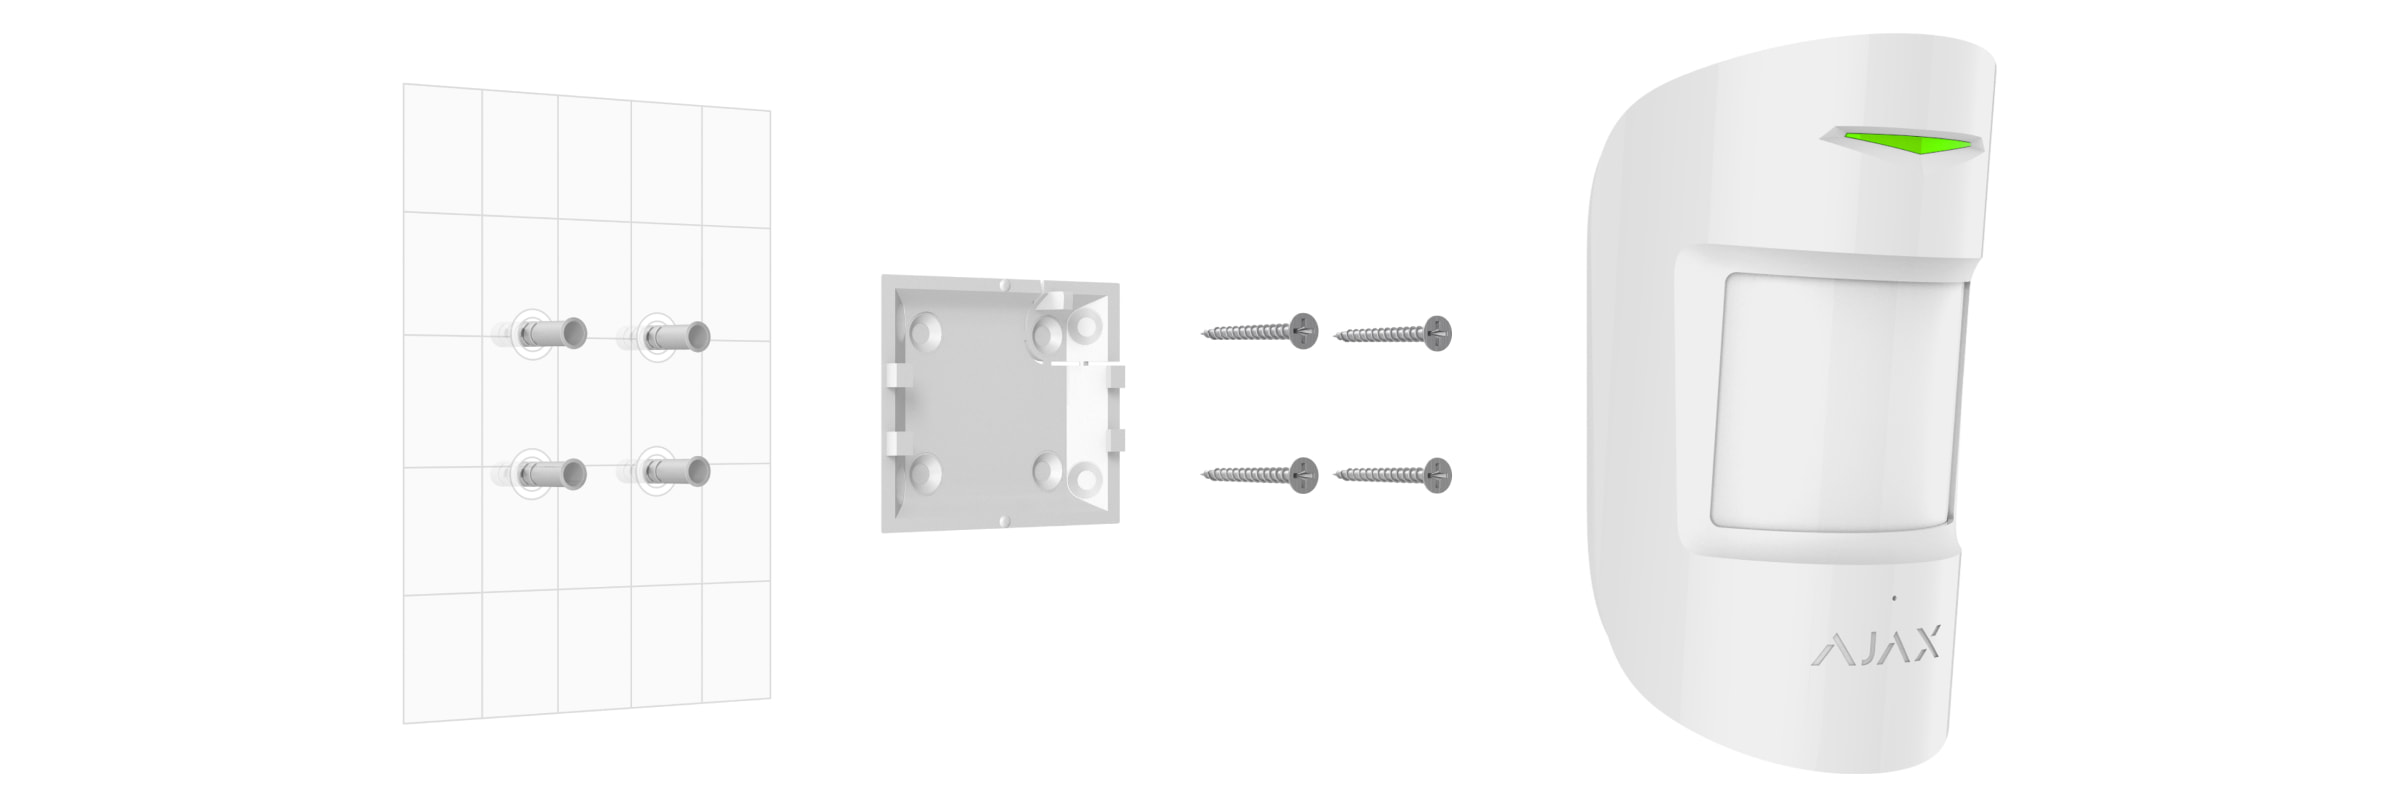
Sensor installation process
Before installing the sensor, make sure you choose the best location and that it meets the requirements of this guide!
The CombiProtect sensor is mounted on a vertical surface or in an angle.
-
Secure the SmartBracket to the surface using all the screws, employing at least two anchor points (one of which should be positioned above the vandal-proof panel). Select other screws, ensuring they do not damage or deform the panel.
Double-sided tape can only be used for temporary attachment of the sensor. The tape will dry out over time, which can lead to reduced sensor sensitivity and trigger the security system. Additionally, the device may be damaged by impact.
-
Slide the sensor onto the mounting plate. As soon as the sensor is secured to the SmartBracket, it will flash with an LED light – this is a signal that the anti-tampering feature on the sensor has activated.
If the sensor indicator light is not working when installed on the SmartBracket, check the vandalism protection status in the Ajax Security System app and then re-secure the device.
You will receive a notification when the sensor is removed from the surface or detached from the mounting plate.
No sensors installed:
-
Outside the room (outside)
-
Oriented towards the window when direct sunlight shines onto the sensor lens.
-
Objects exposed to rapidly changing temperatures (e.g., electric and gas heaters)
-
The object moves in the opposite direction to the temperature, close to that of the human body (like a curtain oscillating on a radiator).
-
In areas with rapid air circulation (fans, open windows, or doors)
-
Being near metal objects and mirrors can degrade or block radio signals.
-
The room's temperature and humidity exceed the permissible limits.
Maintenance
Regularly check the functionality of the CombiProtect sensor.
Clean the sensor housing of dust, cobwebs, and other contaminants as they appear. Use a soft, dry, suitable cloth to care for your device.
Do not use substances containing alcohol, acetone, gasoline, or other active solvents to clean the sensor. Wipe the lens very carefully – scratches on the plastic can reduce the sensor's sensitivity.
The battery installed in the sensor provides up to 5 years of battery life (with a voting frequency of 3 minutes per control panel). When the sensor battery is depleted, the security system will send a corresponding notification, and the LED will light up and turn off when the sensor detects motion or triggers the anti-vandalism function.
Instructions for replacing the battery
Specifications
|
Sensor type |
Electromagnetic microphone, PIR sensor |
|
Motion detection range |
Up to 12 meters |
|
Viewing angle of the motion sensor (H/V) |
88.5° / 80° |
|
Option to skip animals |
Weighing up to 20 kg and reaching a height of 50 cm. |
|
Glass break detection range |
Up to 9 meters |
|
Microphone coverage angle |
180° |
|
Protection against vandalism |
Have |
|
frequency range |
868.0 - 868.6 MHz or 868.7 - 869.2 MHz depending on the sales region. |
|
Maximum radio signal strength |
Up to 20 mW |
|
Radio signal modulation |
Gfsk |
|
Radio range |
Up to 1200 m (in the absence of barriers) |
|
Power |
1 CR123A battery, 3V |
|
Battery life |
Up to 5 years |
|
Operating temperature range |
For the countries of Ukraine and the EAC: From -10°C to +40°C For other areas: From +5°C to +40°C |
|
Working humidity |
Up to 75% |
|
Size |
110 x 65 x 50 mm |
|
Weight |
92 g |
The complete set includes
-
CombiProtect
-
CR123A battery (pre-installed)
-
Mounting kit
-
Brief guide
Guarantee
The warranty for products of "AJAX SYSTEMS MANUFACTURING" Limited Liability Company is valid for 2 years after purchase and does not apply to complete batteries.
If the device isn't working correctly, we recommend contacting support first – in about half the cases, technical issues can be resolved remotely!