
HUB - USER GUIDE
HUB USER GUIDE The Hub is the central device of the entire Ajax security system; it helps coordinate connected devices and interact with users and security companies. The Hub requires an internet connection to link with the server system...

HUB USER GUIDE
The hub is the central device of the entire Ajax security system; it helps coordinate connected devices and interact with users and security companies.
How do you install the Ajax StarterKit if you've never used one before? Watch this tutorial video from boxing champion Oleksandr Usyk.
The Hub requires internet connectivity to link with the Ajax Cloud server system – for system setup and control from anywhere in the world, transmitting event signals and information, and upgrading the device's software. The Ajax Cloud server is based on Amazon's web service. All personal information and details of system activity logs are stored behind multiple layers of protection. And all communication with the Hub is conducted through an encrypted channel 24/7.
To communicate with the Ajax Cloud system, the system uses an Ethernet cable connection and a GSM data network from the mobile service provider.
If possible, please use both internet connection channels. This will help ensure a stable connection between the Hub and Ajax Cloud, preventing connection loss during operation if one of the channels is interrupted.
The Hub can be controlled via an app on iOS and Android phones. The app allows users to respond appropriately to any alerts from the security system.
Click the link below to download the app to your phone:
You can set up a Hub to select the events and methods by which the system will alert users. Choose the solution that you find most convenient: notification via Push notifications on your phone, SMS messages, or direct phone calls. If the Ajax system is outsourced to a security service provider, an alarm signal will be sent directly to them, bypassing the server.
👉 Buy the Ajax Hub intelligent central processing unit.
You can link up to 100 Ajax devices to the Hub. The Jewellery protocol is used for communication between devices, with a range of up to 2km in an unobstructed environment.
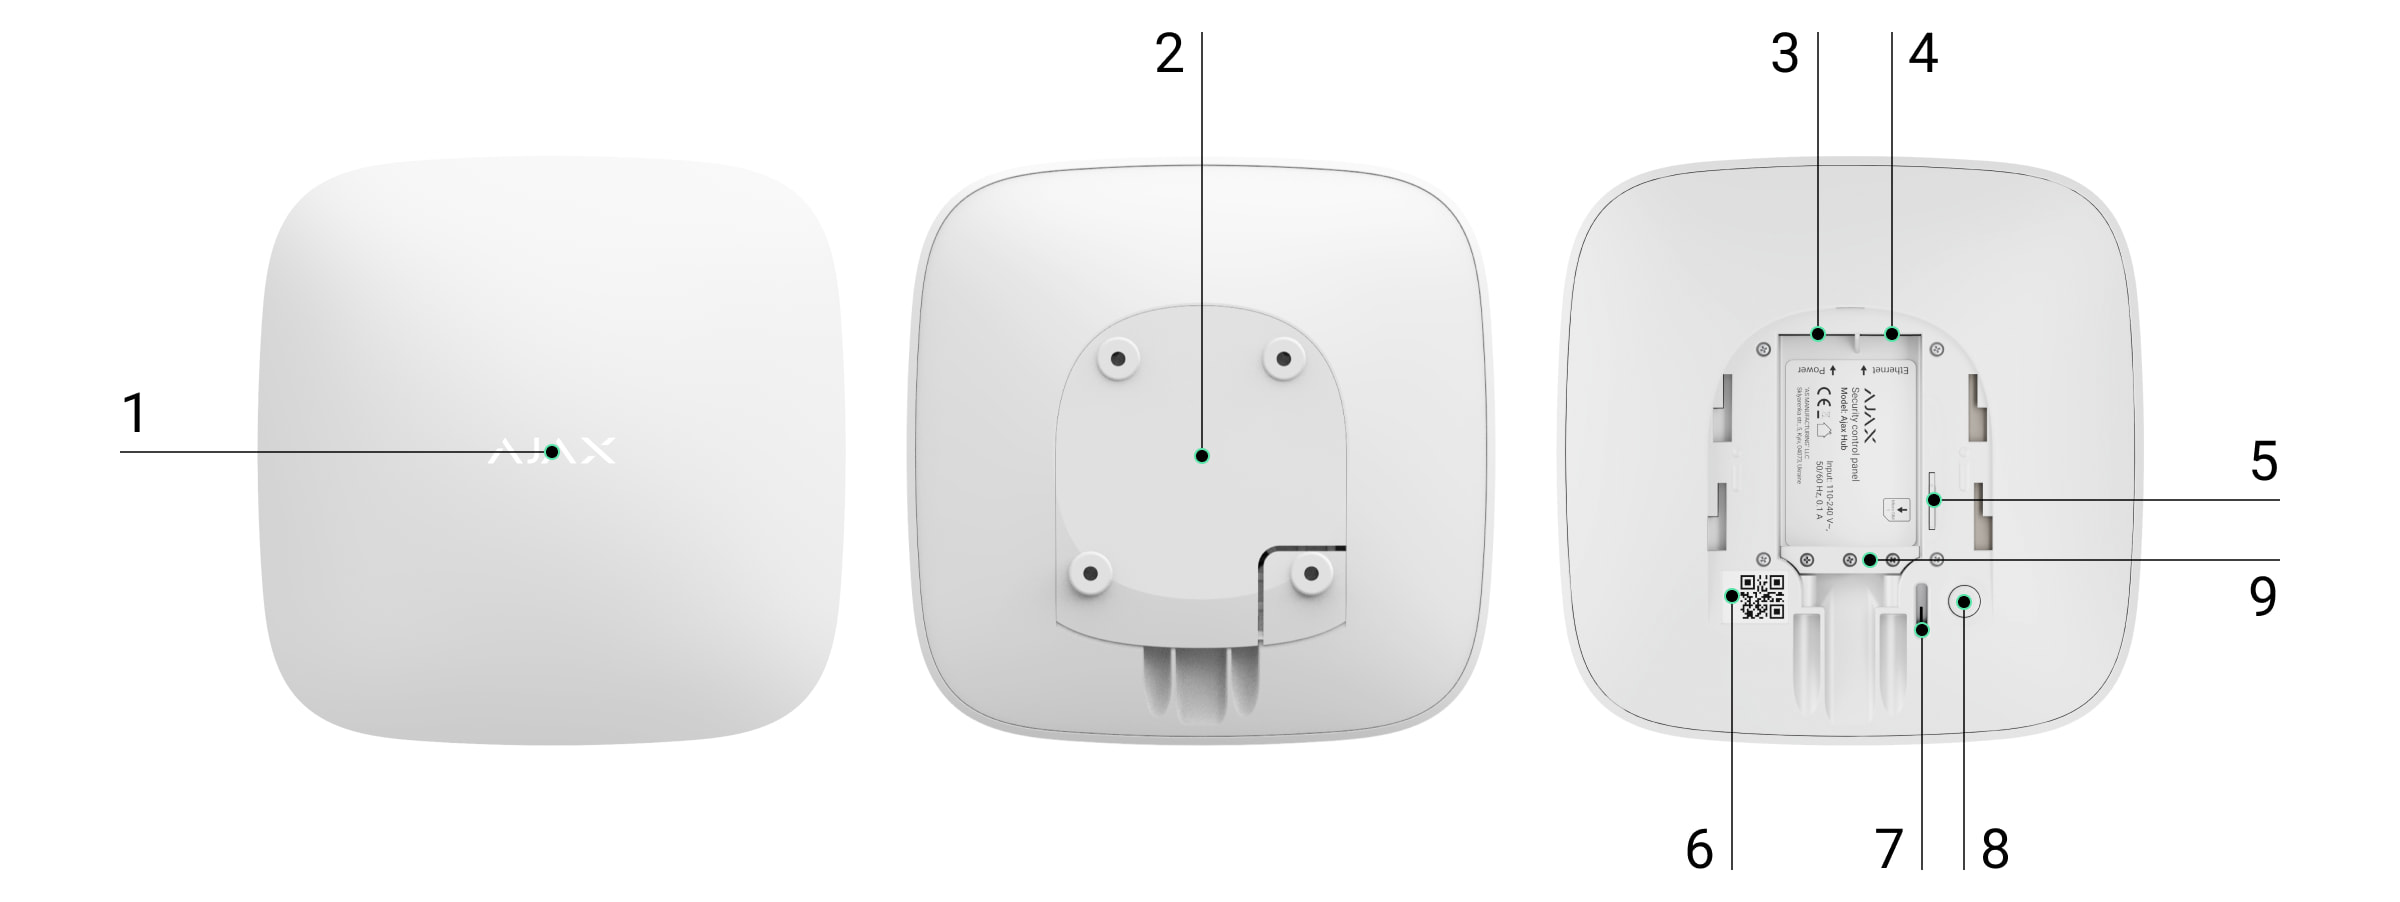
Hub's connection ports and notification signals indicate activity.
-
Logo with traffic lights
-
SmartBracket (The dotted line section is for vandalism protection against unauthorized removal or pulling from the mounting surface. Do not break it!)
-
Connect the power cord.
-
Connect the Ethernet cable.
-
SIM card slot (Micro SIM)
-
QR Code
-
Vandal-proof switch
-
On/Off switch
Hub Logo Indicator Light

|
Content |
Signal |
|
Turn the device on. |
The light turns blue until you press the "on" button - the Hub download process has begun. |
|
Power outage |
The lights will stay on for 3 minutes, then flash every 20 seconds. |
Communicating with Ajax Cloud
The indicator light shows the communication status with Ajax Cloud.
|
Signal |
Link channel |
|
White light |
Both connection channels (Ethernet and GSM) |
|
Green light |
There is only one connection channel. |
|
Red light |
The hub is not connected to the internet, or the internet is unavailable. |
Connect the Hub to the network.
-
Slide open the rear cover of the Hub.

Take care not to damage the anti-vandalism coating that protects the Hub from hacking! -
Connect the power cord and the Ethernet cable to their respective ports.

1 — Power port
2 — Ethernet Ports
3 — SIM Slot -
Press and hold the power button for 2 seconds until the logo lights up. The hub will need approximately 2 minutes to fully boot up and confirm the availability of the channels.

A green or white logo light indicates that the Hub is connected to the server.
If the Ethernet connection doesn't automatically link, disable the proxy, re-filter the MAC address, and enable DHCP in your router's settings—the hub will then receive an IP address. During the subsequent setup process via the web application or on your phone, you can pre-set a static IP address.
To connect to a GSM network, you need a Micro-SIM from your telecommunications provider with a PIN to deactivate it (which allows you to disconnect using the PIN on your phone) and sufficient credit to cover GPRS charges, SMS services, and making calls.
In some regions, the Hub is sold bundled with a SIM card.
If the Hub device is not connecting to Ajax Cloud via the GSM network, use Ethernet to set up network parameters in the mobile application. To specify the correct access point, username, and password, please contact the operator's support service.
Ajax account
The Ajax security system is set up through the application connected to the administrator's account. The account's information about the added Hubs is stored on the Ajax Cloud server in encrypted form.
The user parameters of the Ajax security system and connected devices are stored locally on the Hub and are tightly coupled to it. Any changes made by the Hub administrator do not result in any errors in the settings of the connected devices.
Each phone number can only create one Ajax account.
Create an account in the Ajax system within the mobile app following the step-by-step instructions. As part of the process, you will need to verify your email address and mobile phone number.
Your account can combine roles - administrator of one Hub, user of another Hub.
Add a Hub to the Ajax Security System Application
You must grant the application access to all system functions (specifically, to display notifications)! This is a crucial condition for controlling the Ajax security system from your smartphone/tablet.
-
Enter your account information.
-
Open the "Add Hub" menu and choose the appropriate method - manually or with step-by-step instructions.
-
During the registration phase, specify the Hub's name and scan the QR code located under the lid (or manually enter the registration key).
-
Wait until the Hub is registered and a new device appears on the app screen.
Hub installation
Before installing the Hub, ensure you have chosen the optimal location: the SIM card demonstrates stable signal reception, all devices have been tested for radio communication, and the Hub must be hidden from view.
The hub must be securely attached to the surface (vertically or horizontally). We do not recommend using double-sided tape – it cannot guarantee security and facilitates device removal.
Do not install a Hub device:
-
Outdoor area
-
Being near or inside metal objects or glass surfaces will interfere with the signal.
-
In areas with weak GSM signal or high radio signal interference.
-
In areas where temperature and humidity exceed the permissible limits for the device's operation.
Secure the Hub cover to the surface using the included screws. If using any other attachments, ensure they do not damage or deform the Hub cover.
Hub installation
-
Place the hub on the lid and secure it with the included screws.
-
Securing the Hub cover with screws prevents any accidental movement of the Hub and minimizes the risk of theft.

If the Hub is securely attached, when the device is removed from the surface, the anti-vandalism mechanism will be activated and you will receive a corresponding notification.
Rooms in the Ajax Security System application
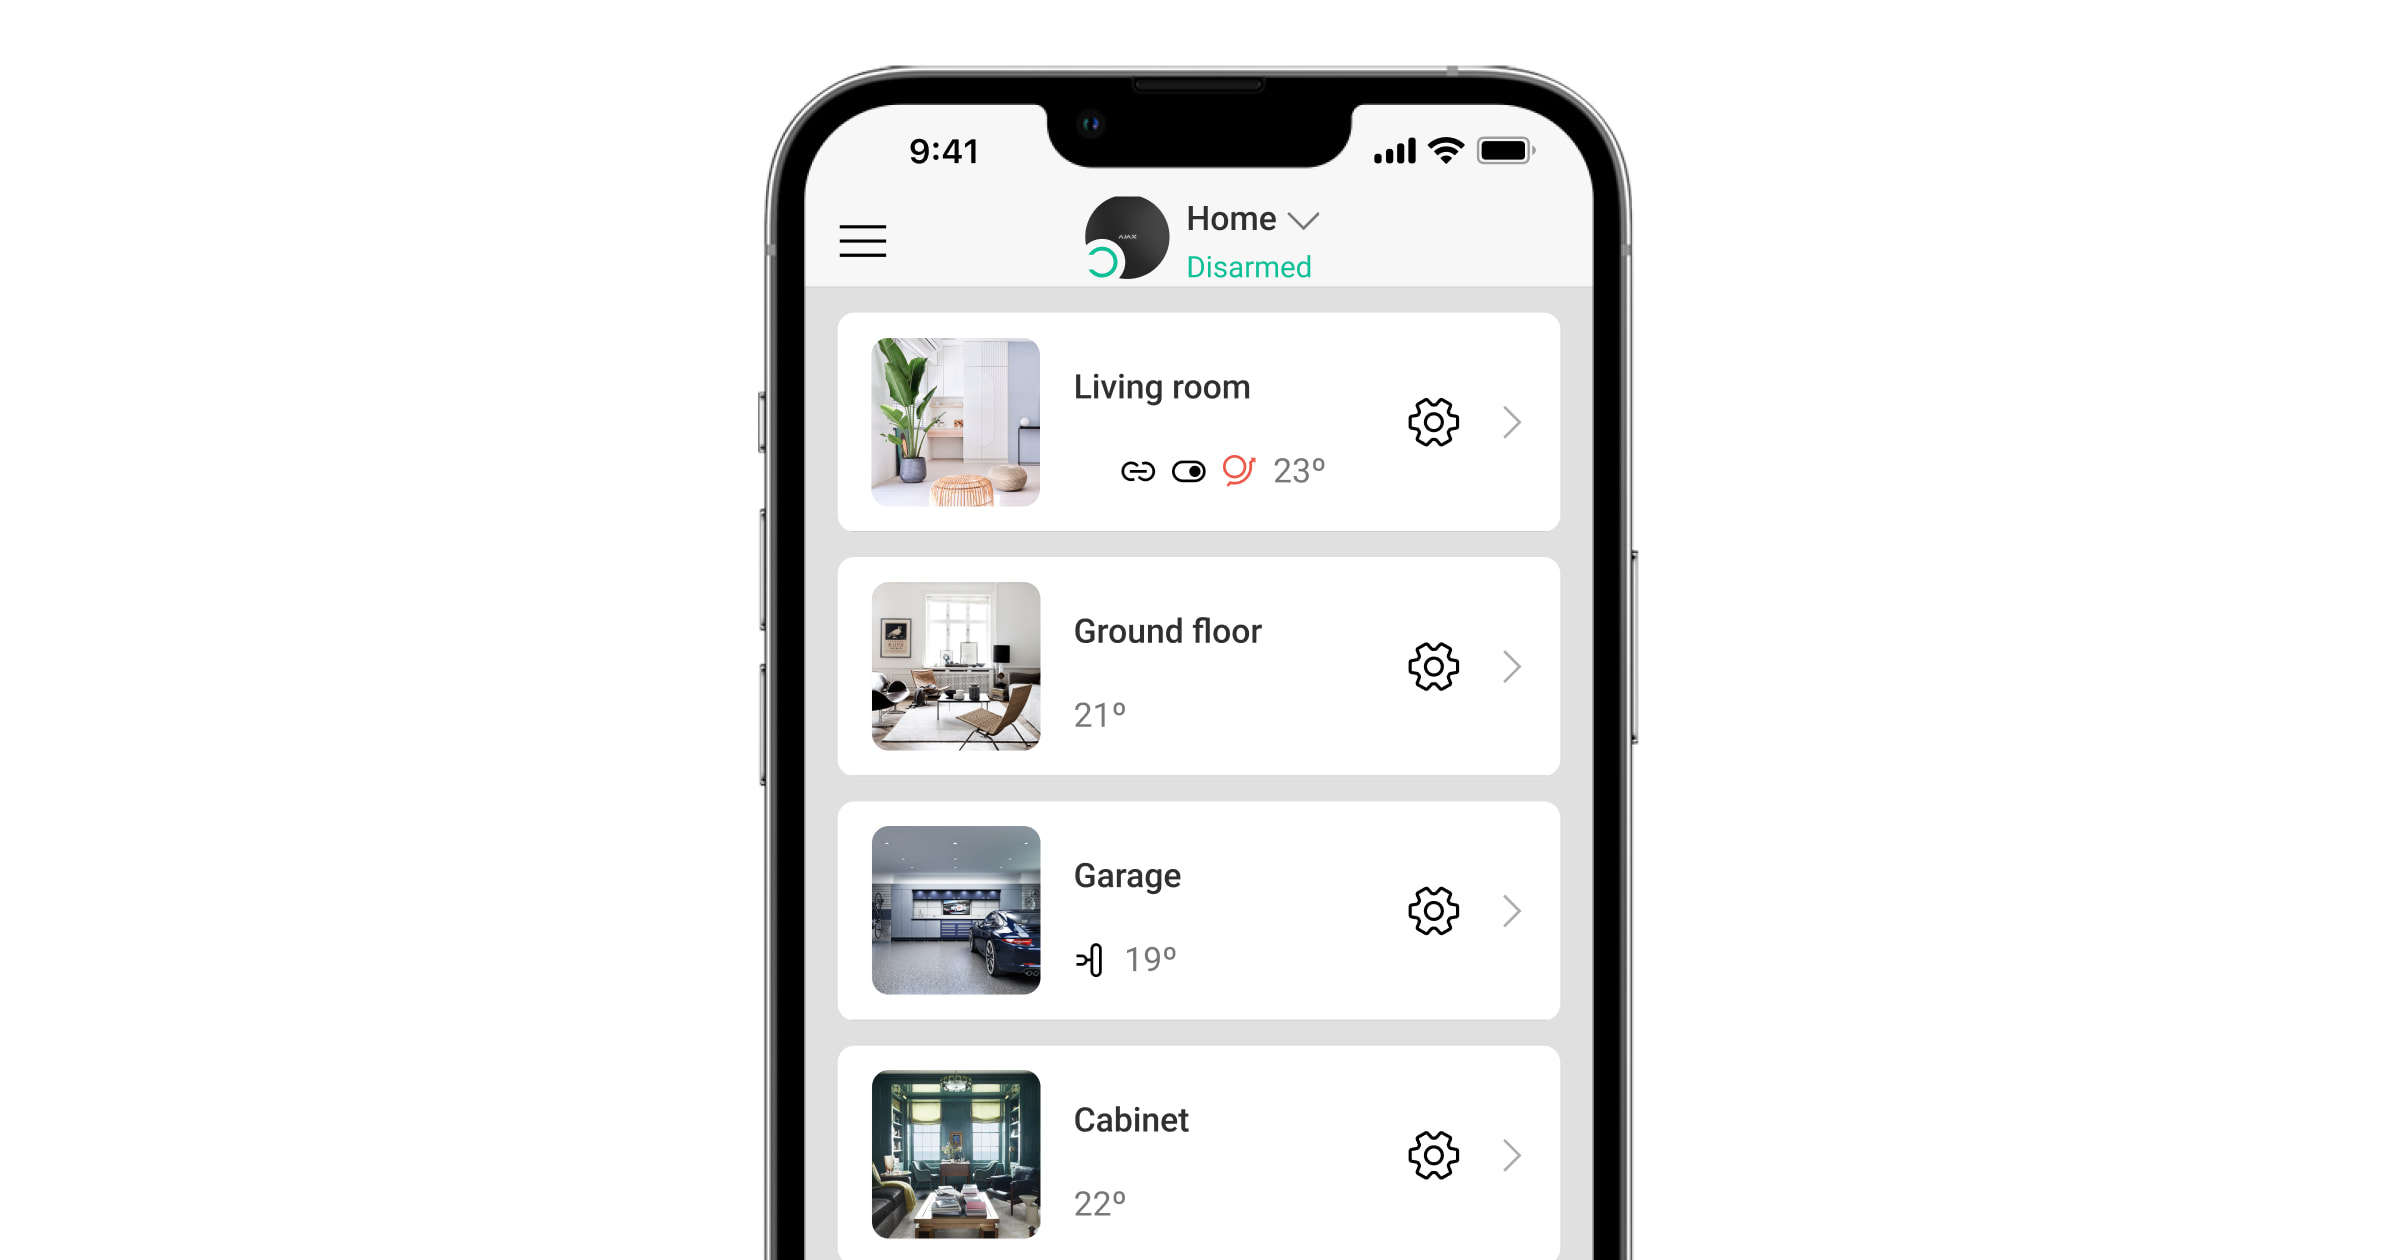
Rooms combine connected devices. The application can create up to 50 rooms, with each device located in only one room.
Without creating a room, you won't be able to add devices to the Ajax Security System app!
Create and set up a Room
Rooms are created in the mobile app and web app through the "Add Room" menu.
Assign a name to the room, and if desired, attach (or create) a photo – this will make it easier to find the required room in the list.
Press the [⚙️] key to access the settings menu.
To delete a room, move all devices stored in that room to other rooms through the device settings menu. Deleting a room will erase all of its settings.
Connect the devices to the Hub.
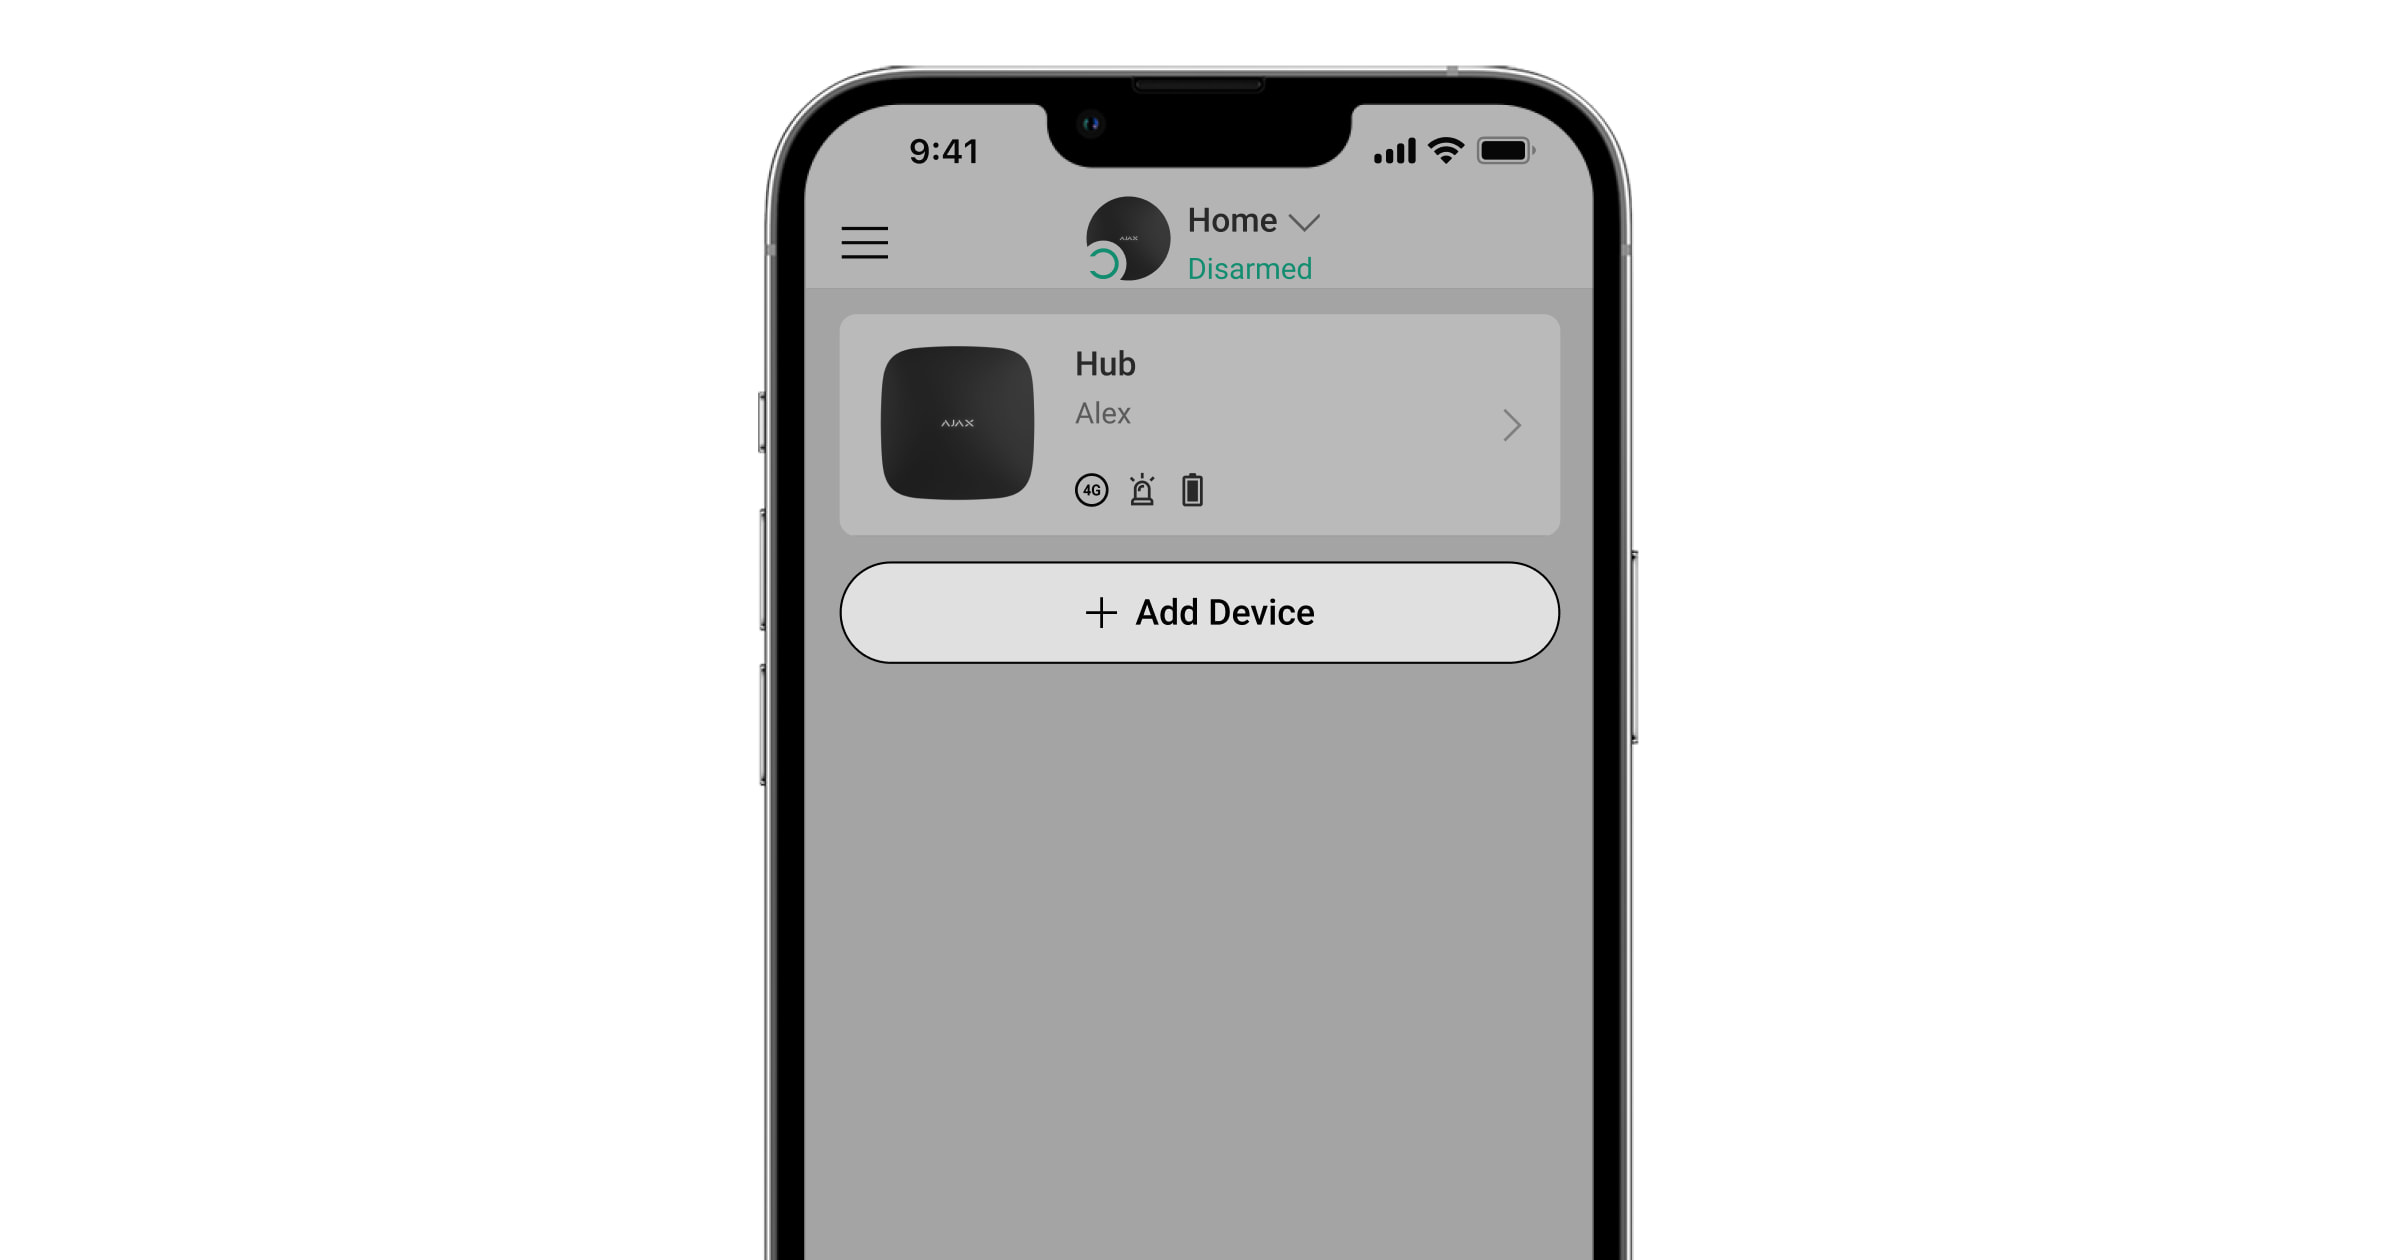
During your initial registration with Hub in the mobile app, you'll be prompted to add a device to protect your room. However, you can decline and return to this step later.
The device can only be added if the system is in an inactive state.
-
Open a room in the mobile app and select the "Add device" option.
-
Give the device a custom name, read the QR code (or manually enter the ID), select the room location, and move on to the next step.
-
When the application starts searching and launching the countdown, turn on the device - it will flash once with the LED. For detection and interference to occur, the device must be placed within the coverage area of the Hub's wireless network (at a single protected location).
The request to connect to the Hub is transmitted briefly at the time of switching on the device.
If the connection to the Hub fails on the first attempt, turn off the device for 5 seconds and repeat the attempt.
Set up the Hub
The settings for the Hub and the devices connected to it are set in the "Hub Settings" menu [⚙️].


Adjustment parameters:
-
Users – who has access to your security system, what permissions are granted to them, and how the Hub notifies you about events.
-
Ethernet - establishes a wired Ethernet connection.
-
GSM - turn mobile communication on/off, establish connection, and verify account.
-
Geofence – a reminder to arm/disarm the security system from intrusion detection mode if a specific area is breached. The user's location is determined based on GPS antenna data and iBeacon beacons (Apple devices only).
-
Group - Group mode settings
-
Check the detection area - check the detection area of the devices connected to the Hub.
-
Jeweller - determines the time interval for requesting the Hub detector and the number of unsent data packets.
The query interval of the detectors by the Hub determines the frequency with which the devices exchange data. The smaller the interval (in seconds), the faster the Hub learns about events from connected devices and devices receiving commands from the Hub. Information about any alarms or acts of vandalism is then transmitted immediately.
The value of the number of undelivered packets will determine how quickly the Hub learns about the loss of a connected device.
Calculate the alarm time (with default parameters):
(8 packets + 1 adjustment) x 36-second interval = 5 minutes 24 seconds
We should remember that the short time interval limits the maximum number of devices that can be connected:
|
Time period |
Connection limits |
|
12 seconds |
39 devices |
|
24 seconds |
79 devices |
|
36+ seconds |
100 devices |
-
Services - a group of Hub service settings.
-
Connection error alert delay - the specified delay period for notifying about a loss of communication with the server.
-
The ping interval – the time it takes for a ping to be sent from the Hub to the server.
-
The time it takes to create a lost communication message between the server and the Hub is calculated as follows (with default parameters):
(3 pings + 1 correction) x required time interval of 30 seconds + time filter of 300 seconds = 7 minutes.
-
You can change the settings to enable automatic updates for the hub (which is enabled by default).
👉🏻 How to turn off automatic software updates
-
Monitoring station - connect to CMS settings
-
PRO - PRO Account on Hub
-
Security company - the security company in your area
Reset the Hub to its factory settings.
To reset the Hub to its factory settings, turn it on, then hold the "on" button for 30 seconds (the logo will start flashing red).
At that point, all sensor devices, room settings, and user settings will be erased. User profiles will still remain connected to the system.
Users
After adding a Hub to your account, you will become an administrator of this device. A Hub can have up to 50 users/administrators. Administrators can invite users to the secure system and define their permissions.
Notifications about events and alerts

Hub notifies users of events through three methods: push notifications on mobile devices, SMS messages, and phone calls.
Notifications are set up in the "Users" menu:
|
Type of event |
Purpose |
Notification type |
|
Activate/Deactivate |
Notifications received after activation/deactivation |
|
|
Alarm |
Upon detecting break-ins, fires, and flooding. |
|
|
Events |
Notification of events related to controlling Ajax WallSwitch and Relay devices. |
|
|
Device error |
Notifications about loss of connection, interference, low battery, or unlocking the touchscreen device. |
|
-
Push notifications are sent by the Ajax Cloud server to the Ajax Security system application, if an internet connection is available.
-
SMS - sent to the phone number specified by the user during the Ajax account registration process.
-
Call the number registered on the Hub.
We only call in case of an alarm to draw your attention and reduce the likelihood of you missing important notifications. You should enable this type of notification. The center continuously calls all users who have enabled this type of notification in the order specified in User Settings. If a second alarm occurs, the center will repeat the call, but no more than once every 2 minutes. The call will automatically be canceled as soon as you answer. We recommend that you save the phone number associated with the center's SIM card in your contact list.
Notification settings can only be changed for registered users.
Connecting the Ajax system to a security company.
A list of organizations connecting the Ajax system to the central monitoring station is provided in the "Security Companies" menu of the Hub settings.
Contact a representative of the service provider in your city and negotiate a connection.
Connection to the central monitoring station (CMS) is made via Contact ID or SIA protocols.
Ajax system maintenance
Regularly check the functionality of the Ajax security system.
Clean the Hub's body of dust, cobwebs, and other contaminants as they appear. Use a suitable soft, dry cloth for maintenance.
Do not use any substances containing alcohol, acetone, gasoline, or other active solvents to clean the Hub.
The complete set includes:
-
Hub
-
Power cable
-
Ethernet cable
-
Mounting screws
-
GSM SIM card (not included in some countries)
-
User manual
Safety conditions
When installing and operating the Hub, please adhere to general electrical safety regulations for the use of electrical equipment, as well as the requirements of legal conduct regulations concerning electrical safety.
Disassembling the device while it is energized is strictly prohibited! Do not use the device if the power cord is damaged.
Technical specifications table
|
Maximum number of connected devices |
100 |
|
Maximum number of groups |
9 |
|
Maximum number of rooms |
50 |
|
Maximum number of users |
50 |
|
Source |
110 – 240 V AC, 50 / 60 Hz |
|
Power bank |
Li-Ion 2 A⋅h battery (up to 15 hours of operation with GSM connection) |
|
Protection against vandalism |
Have |
|
Bandwidth |
868.0 – 868.6 MHz or 868.7 – 869.2 MHz depending on the region. |
|
Operating capacity |
8.20 dBm / 6.60 mW (limit 25 mW) |
|
Type of radio wave signal |
GFSK |
|
Connection range |
Up to 2,000 m (unobstructed view) |
|
Communication channels |
GSM 850/900/1800/1900 MHz GPRS, Ethernet |
|
Temperature range |
For Ukraine and East African countries: From -10°C to +40°C For other countries: From +5°C to +40°C |
|
Size |
1623 x 163 x 36 mm |
|
Moisture tolerance |
Up to 75% |
|
Mass |
350 g |
Guarantee
The product comes with a 2-year manufacturer's warranty.
If the device is not working as designed, please contact our technical support department before sending it in for warranty service – as over 50% of cases are simply issues with settings.